Ever wondered how to crack open one of Black Myth: Wukong's most elusive secrets and snag that legendary Weaver's Needle Vessel? Well, buckle up, Destined Ones, because we're diving deep into the miasma-filled peaks of Purple Cloud Mountain! This hidden Chapter 4 area isn't just a stroll in the park – it's a gauntlet of three formidable bosses, each guarding unique treasures. But first, you gotta get past the gatekeeper: the tricky Venom Daoist. Think you're ready to face the Scorpionlord's sting, Daoist Mi's betrayal, and The Duskveil's twilight fury? Let's break it all down!
Step 1: Hunting the Gatekeeper - The Venom Daoist
Before you can even smell the purple clouds, you need to find and defeat the Venom Daoist... not once, but twice! This agile but fragile foe is your key to the mountain.
First Encounter: Pool of Shattered Jade
Start your hunt from the Upper Hollow Shrine. Take an immediate left onto the web-covered path. Follow it to a large platform, jump down near the brazier, and head through a passage of hanging sacks (watch out, some are alive!). You'll know you're close when you see a spiraling path with enemies dangling from the ceiling. Eventually, you'll find a large hanging sack behind a shrine – that's your cue. The fight here is straightforward; he's weak to burst damage. Go all out with your Focus and spells like A Pluck of Many!

Second Encounter: Temple of Yellow Flowers
This one's a trek. Progress through Chapter 4 until you reach the Temple of Yellow Flowers. From the Temple Entrance Shrine, go up the stairs, through the gateway, and take a left. When you encounter a Snake Guai, take a right and continue up. At the top, you have a choice:
-
Left: Leads to the Venom Daoist and the entrance to Purple Cloud Mountain.
-
Right: Leads to an optional Fungiwoman fight and a new Drink.
Pro-Tips for the Fight:
-
He's agile but has low HP. 3-4 Focus Heavy Attacks or A Pluck of Many melt him.
-
Use Immobilize or freeze him with Umbral Abyss and the Apramana Bat Spirit to land fully charged hits.
-
First fight: Use resources freely.
-
Second fight: Be strategic! He heals to full at ~33% HP for a final phase. Save your Mana for that moment, using rechargeable effects (Spirit, Transformation) to push through. When he hits ~60% in the final phase, unload your Mana to finish him.
-
When he chains attacks, just dodge. His aerial moves have long recovery – perfect counter windows!
After victory #2, a spectral gateway appears – welcome to Purple Cloud Mountain!
Step 2: Gearing Up & The First Choice
Before charging in, prepare! This area is poison-central. Stock up on Anti-Miasma Powder and consider using the Gall Gem Soak in your Gourd to boost poison resistance. You'll thank us later.
Now, your first major choice awaits. The initial boss you meet is the Scorpionlord, casually drinking. You can:
-
Fight Him: Smash his booze pots to enrage him. This unlocks the Deathstinger weapon and Stained Jade Gourd.
-
Ignore Him: Run past. If you do, he'll later aid you as an ally during the final fight against The Duskveil... but you forfeit his loot.
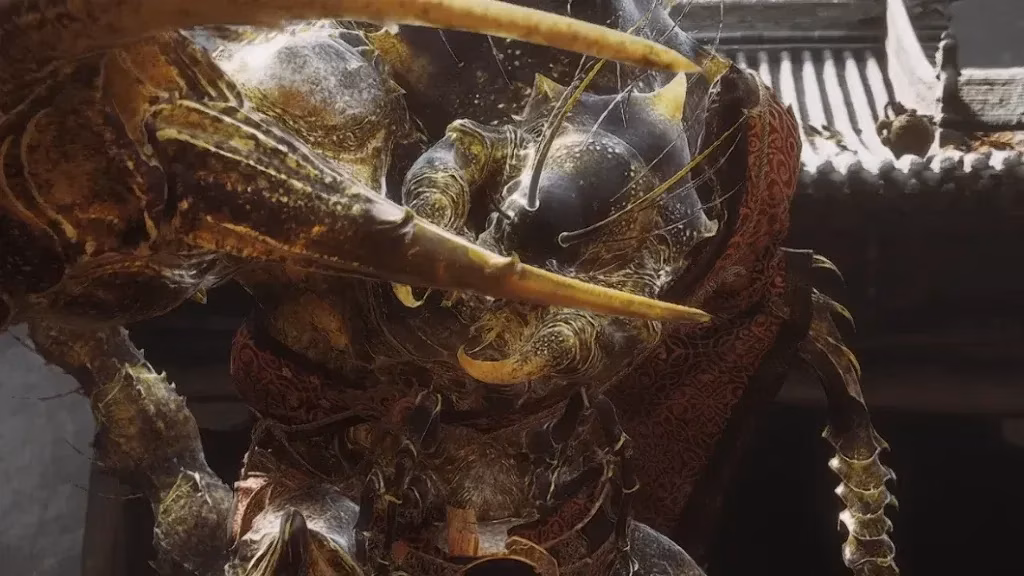
Step 3: Boss #1 - The Scorpionlord (Optional but Rewarding)
Choosing to fight? Prepare for one of Chapter 4's toughest battles. He's hyper-aggressive, mixing rapid claw combos with poisonous tail strikes. Healing windows are scarce; you might have to tank poison damage while dodging. The Non-Void Spirit is a lifesaver here for its defensive backstep.
Attack Patterns & Counters:
| Attack Signal | What Happens | How to Dodge |
|---|---|---|
| Claw glows YELLOW | Flurry of strikes or a long charge. | Build distance immediately. |
| Tail glows GREEN | 2-3 hit combo: a long "thrust" or sweeping "slash." Leaves poison puddles that explode. | Thrust: Dodge left/right. Slash: Time your dodge perfectly. |
| Claw + Tail Combo | Mixes both attacks. | Watch his body – whatever glows tells you the next move. |
| Dig Attack | Burrows, then erupts under you. | Time your dodge or use Cloud Step to negate it and ambush him after. |
Step 4: Boss #2 - The Deceitful Daoist Mi
Further in, you meet Daoist Mi. He sends you on a "quest" to fetch Violet Hail from a nearby monk. It's a trap! Return the item, and he attacks, triggering a two-phase fight.
-
Phase 1: He uses fast martial arts and sword combos. They're not super damaging but are quick. He's easy to interrupt with Light Finishers and Heavy Attacks. Use a Transformation to pressure him, but SAVE YOUR MANA FOR PHASE 2.
-
Phase 2: At 0 HP, he consumes the Violet Hail, transforming into a giant, flailing Armorworm with poison attacks. He's unpredictable! This is where you spend your Mana. Use Immobilize and A Pluck of Many to burn his health. Thrust Stance or Pillar Stance are great for attacking from outside his poison clouds.
Victory rewards you with the Violet Hail Transformation Spell, letting you become a poison-spewing Armorworm!
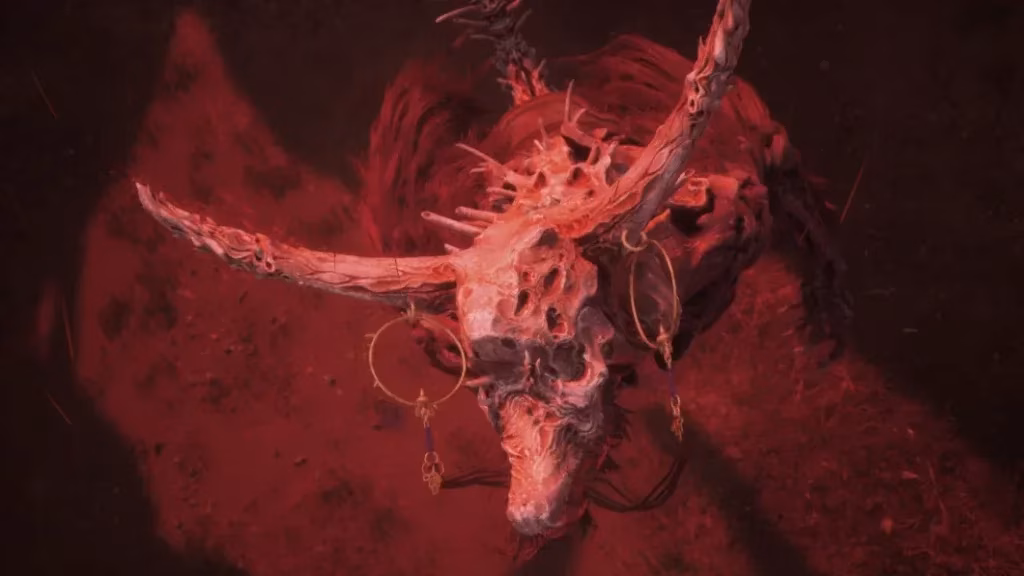
Step 5: The Final Showdown - The Duskveil
The peak of Purple Cloud Mountain holds your ultimate goal: The Duskveil. This is another grueling two-phase fight. He has a massive health pool, so in Phase 1, play defensively. Read his slow, methodical attacks, dodge, and conserve all resources for the explosive Phase 2.
Phase 1 Breakdown:
-
Basic Moves: Claw rakes, head slams, and stomps. Dodge and learn the timings.
-
Opener: Often a projectile volley. Dodge forward through it to close the gap, or use Staff Spin to deflect.
-
Fast Punch: Short animation, hard to avoid, but low damage.
-
Spinning Jump Strike: He leaps, spins, and crashes down. Tough to dodge due to camera angles, but survivable. Focus on avoiding the final impact.
Phase 2 Breakdown (Starts at 0 HP):
The boss gains a sword, breath attacks, and enhanced versions of his old moves.
-
Red Mist Aura: Surrounds himself, draining your health over time. Don't linger; manage your Gourd charges.
-
Energy Sword Volley: Throws horizontal blades of energy. Timed dodges are key; sprinting won't save you.
-
Breath Attack: Spews red mist in a cone. Dodge through it to stay on the offensive.
-
Enhanced Projectile Volley: Fires a bigger wave, leaps, fires more volleys mid-air, then crashes down. Staff Spin is excellent here, or use Cloud Step to create a decoy.
-
Dangerous Sword Combo: Several sweeps, then he leaps and slams his sword into the ground. RUN AWAY after he lands to avoid the massive explosion.
Win Condition: Use A Pluck of Many and Immobilize for burst damage (but don't immobilize him mid-air!). Persevere, and the legendary Weaver's Needle Vessel is yours – a weapon supremely effective against Chapter 4's final boss, the Hundred-Eye Daoist!
Quick Recap & Final Thoughts
So, to conquer Purple Cloud Mountain in 2026:
-
Find & Defeat Venom Daoist at the Pool of Shattered Jade.
-
Find & Defeat Him Again at the Temple of Yellow Flowers to unlock the mountain.
-
Prepare with poison resistance items.
-
Choose: Fight Scorpionlord for loot, or spare him for an ally later.
-
Complete Daoist Mi's "quest," then defeat his two forms for the Violet Hail Transformation.
-
Face The Duskveil, conserve resources in Phase 1, and unleash everything in Phase 2 to claim the Weaver's Needle Vessel.
It's a challenging, rewarding side journey that tests every skill you've learned. The bosses are no joke, but the spoils are legendary. Now go forth, Destined One, and claim your prize! 💪✨